Introduction
You know that satisfying moment when you hit the power button and your Linux machine springs to life? As someone who's spent way too many nights debugging why a server wouldn't boot after a kernel update, I can tell you the process is far more fascinating than most people realize. It's a beautifully orchestrated chain of events that turns cold hardware into a fully functional operating system in seconds.
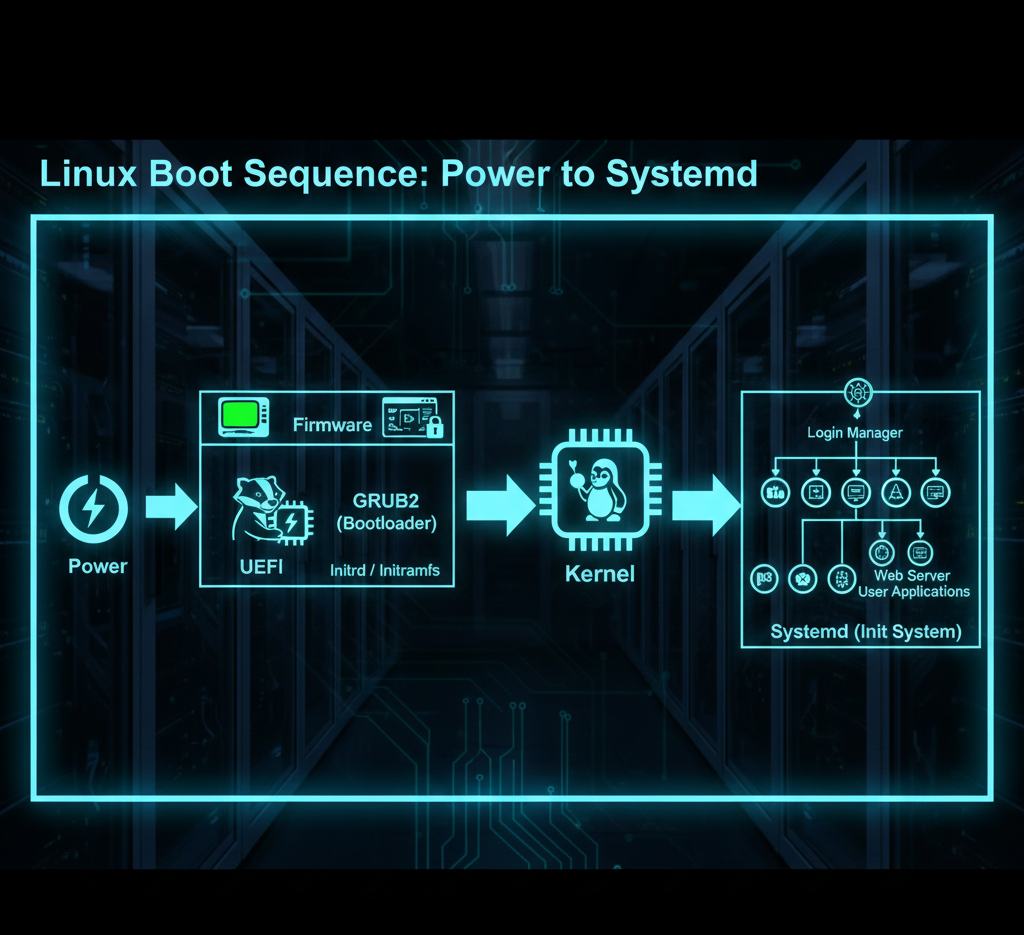
In this post, I'll walk you through the entire Linux boot process from start to finish. We'll cover the firmware layer (BIOS vs UEFI), the boot loader that hands off control, the kernel that wakes up the hardware, and finally Systemd – the modern init system that brings everything else to life. This isn't just theory; these are the exact steps I've traced countless times in production environments when things went sideways.
BIOS/UEFI: The Hardware Wake-Up Call
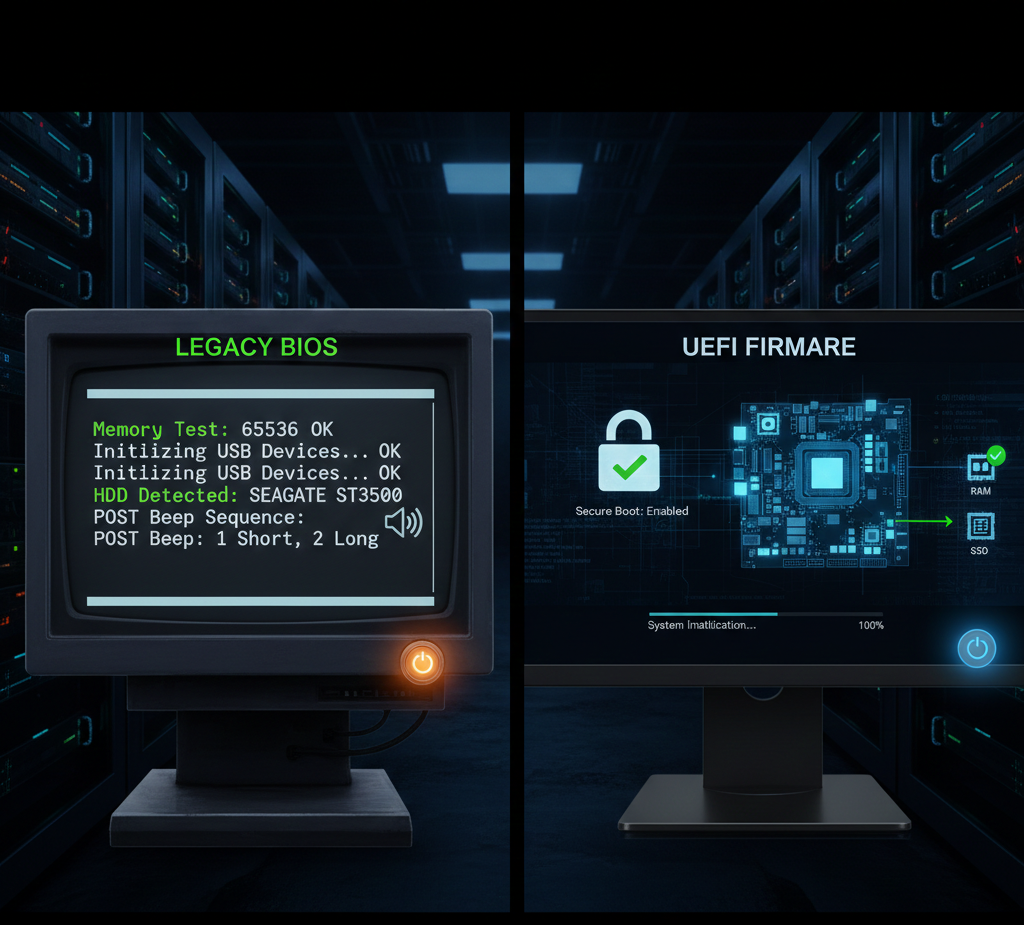
The moment you press the power button, the firmware takes over. On older systems this is BIOS; on modern ones it's UEFI.
The firmware runs a Power-On Self-Test (POST) to check that RAM, CPU, storage, and other hardware are healthy. If anything fails, you'll hear those familiar beep codes or see error lights. Once POST passes, the firmware looks for a boot device.
Here's where the big difference shows up:
- BIOS + MBR: Limited to 2TB disks and 4 primary partitions. It's simple but ancient.
- UEFI + GPT: Supports massive drives, unlimited partitions, Secure Boot (which verifies signed bootloaders), and much faster boot times.
In my experience, switching to UEFI on new hardware shaved seconds off boot times and made dual-booting Windows and Linux far less painful.
The Boot Loader: GRUB2 Steps In
Once the firmware finds a bootable device, it loads the boot loader – usually GRUB2 on Linux systems.
GRUB2's job is straightforward but critical:
- Locate the Linux kernel on disk
- Load the kernel into memory
- Pass any kernel parameters (like quiet splash or root device)
- Hand over control
I still prefer GRUB2 over the ancient LILO because it handles multiple OSes gracefully, supports encrypted root partitions, and lets you edit boot parameters on the fly during boot (huge lifesaver when a bad kernel update breaks things).
The Linux Kernel: Taking Control
Now the real fun begins.
The kernel decompresses itself in memory, then:
- Initializes hardware (CPU, memory management, interrupts)
- Loads essential device drivers and kernel modules
- Mounts the root filesystem (usually read-only at first)
This is the moment the machine stops being "just hardware" and becomes Linux. I've watched kernel logs during this phase hundreds of times – it's mesmerizing to see drivers load for your GPU, network card, and storage controller one by one.
Systemd: The Parent of All Processes
Once the kernel is happy, it starts the first user-space process: systemd (PID 1).
Systemd is the modern replacement for the old SysV init scripts. It:
- Loads remaining drivers and modules
- Mounts all filesystems
- Starts background services (networking, sound, power management, SSH, etc.)
- Handles user logins
- Launches the display manager (GDM, SDDM, LightDM) and desktop environment
It uses "targets" instead of runlevels – graphical.target for desktop, multi-user.target for servers. This makes boot parallel and blazing fast compared to the old sequential startup.
In production, I've used systemd's dependency system to ensure databases start before web servers – something that was painful with older init systems.
Conclusion
The Linux boot process is a masterpiece of layered responsibility – each stage hands off cleanly to the next, from hardware initialization to a fully running desktop. Understanding it has saved me more times than I can count when debugging mysterious boot failures.
Next time your system boots, take a second to appreciate the invisible work happening in those few seconds. And if you ever see a boot failure, knowing this sequence is your best debugging weapon.